Sampling Artifacts in Computer Graphics 采样造成的走样
锯齿 Jaggies – 空间采样
摩尔纹 Moire Patterns – 欠采样图像 undersampling
车轮效应 Wagon wheel effect – 时间采样
。。。
根本原因:信号改变太快(high frequency),但是采样太慢。
抗锯齿采样: Antialiased Samping
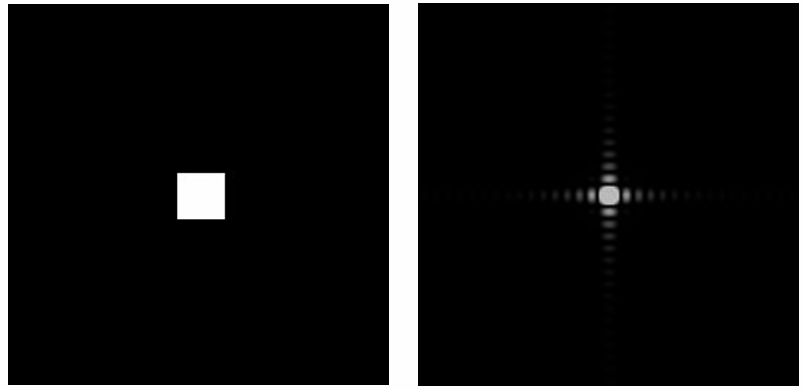
Frequency Domain 频域
从频域分析走样:
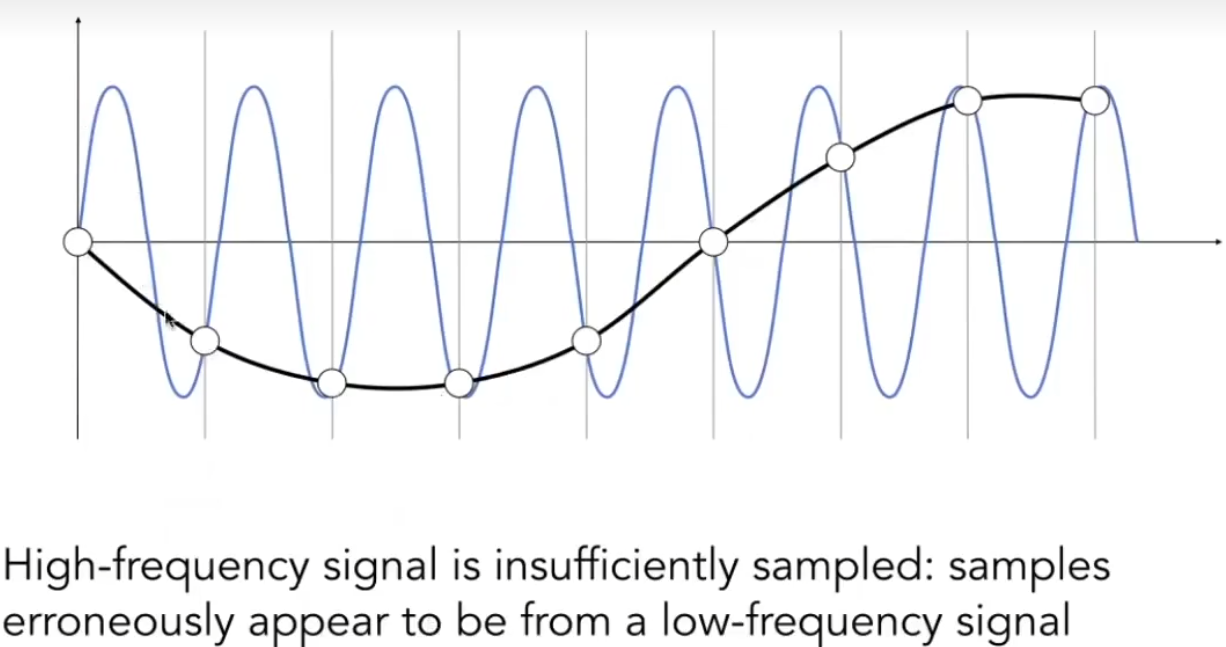
高频信号采样不足:采样结果显示为低频信号
在给定的采样频率下,两种频率无法被区分的现象称为走样
High-frequency signal is insufficiently sampled: samples
erroneously appear to be from a low-frequency signal
Two frequencies that are indistinguishable at a given sampling
rate are called “aliases”
滤波
Filtering = Getting rid of certain frequency contents

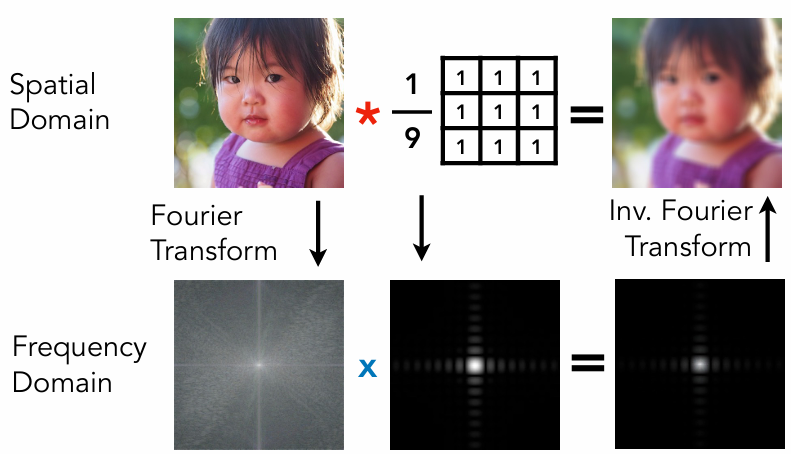
Filtering = Convolution (= Averaging):
卷积定理:
时域卷积 = 频域乘积
时域乘积 = 频域卷积
Convolution in the spatial domain is equal to multiplication
in the frequency domain, and vice versa
Option 1:
• Filter by convolution in the spatial domain
Option 2:
• Transform to frequency domain (Fourier transform)
• Multiply by Fourier transform of convolution kernel
• Transform back to spatial domain (inverse Fourier)
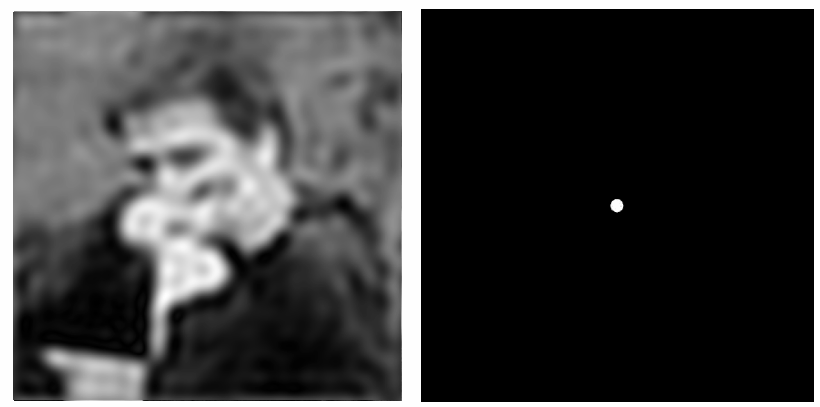
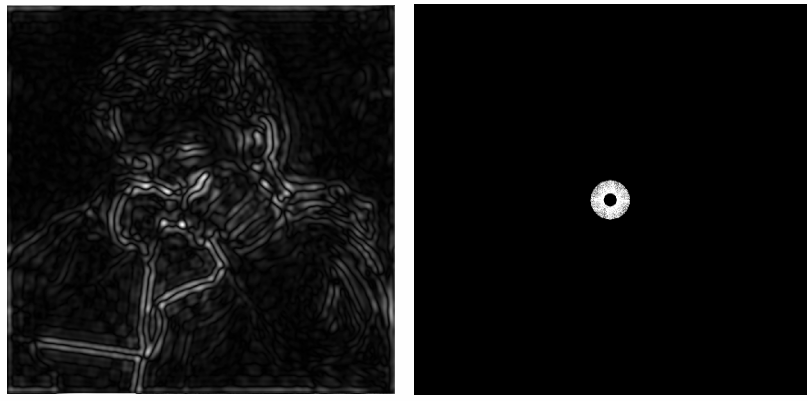
Wider Filter Kernel = Lower Frequencies
Sampling = Repeating Frequency Contents
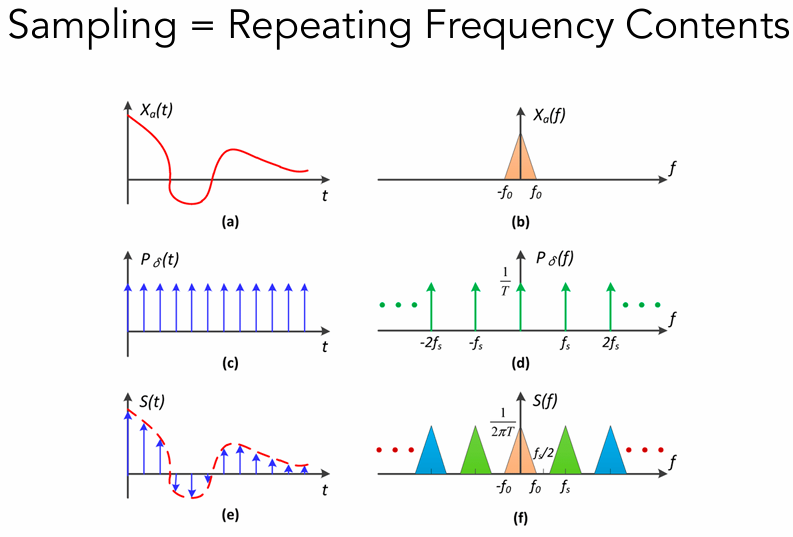
如(f)所示,采样在频域就是在重复原始信号的频谱
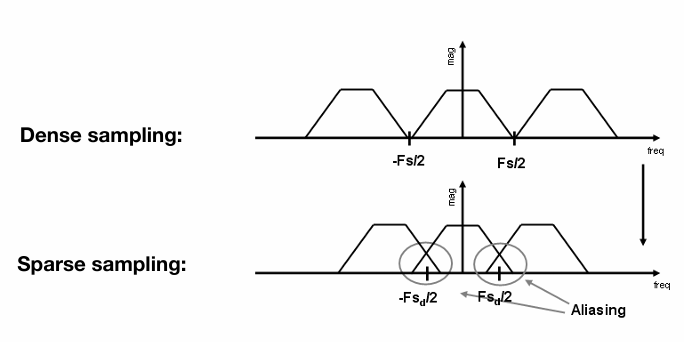
Aliasing = Mixed Frequency Contents
走样相当于采样后的频谱发生了混叠
Antialiasing 反走样
如何减少走样误差?How Can We Reduce Aliasing Error?
Option 1: Increase sampling rate
• Essentially increasing the distance between replicas in the
Fourier domain
• Higher resolution displays, sensors, framebuffers…
• But: costly & may need very high resolution
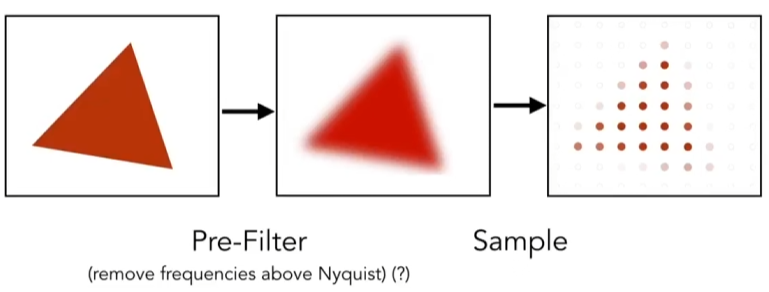
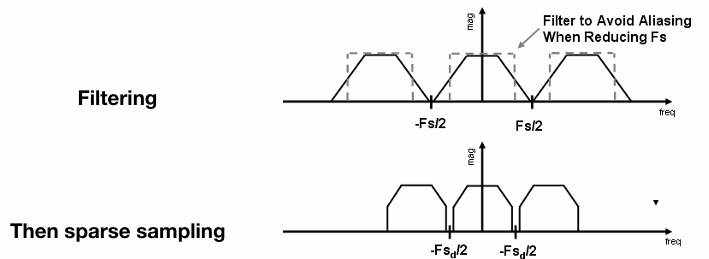
Option 2: Antialiasing
• Making Fourier contents “narrower” before repeating
• i.e. Filtering out high frequencies before sampling
Antialiasing = Limiting, then repeating
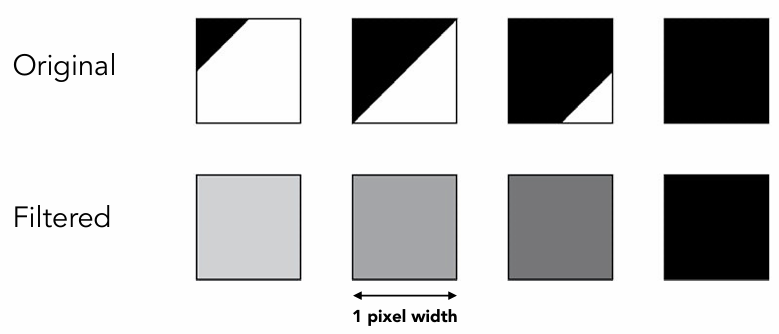
Antialiasing By Averaging Values in Pixel Area
Solution:
• Convolve f(x,y) by a 1-pixel box-blur
Recall: convolving = filtering = averaging

• Then sample at every pixel's center
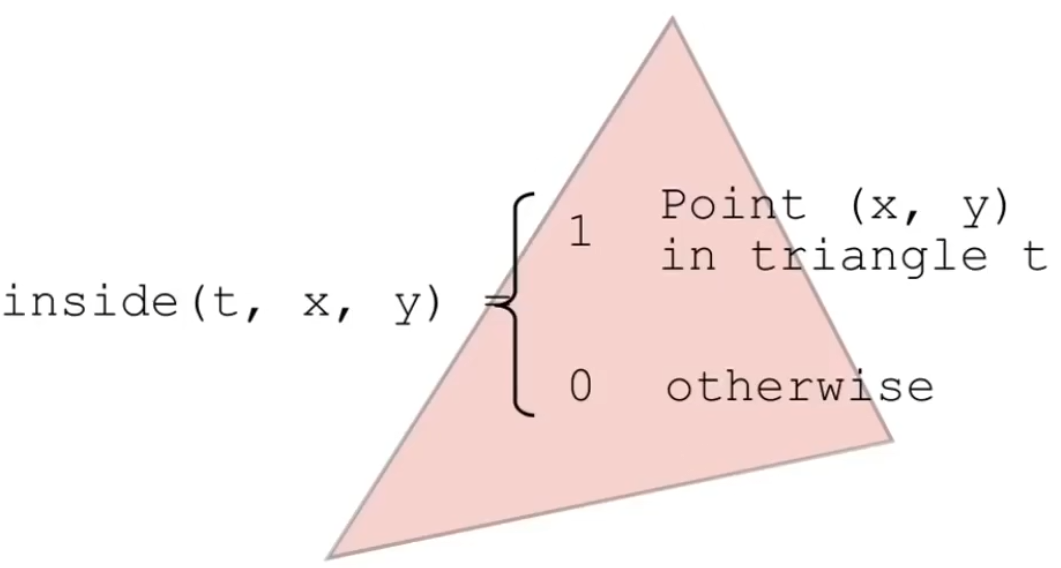
In rasterizing one triangle, the average value inside a pixel area of f(x,y) = inside(triangle,x,y) is equal to the area of the pixel covered by the triangle.
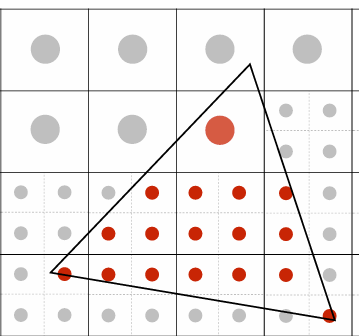
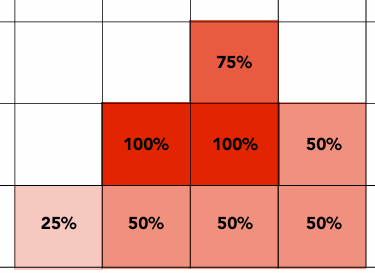
Antialiasing By Supersampling(MSAA)
Supersampling 超采样:
Approximate the effect of the 1-pixel box filter by sampling multiple locations within a pixel and averaging their values:
Supersampling: Step 1
Take NxN samples in each pixel.
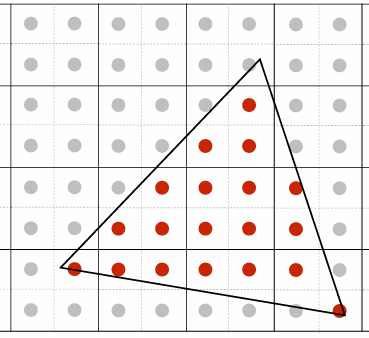
Supersampling: Step 2
Average the NxN samples “inside” each pixel.
如第二排第三个点,超采样中有3个点在三角形中,所以该像素取75%灰度
Antialiasing Today
No free lunch!
• What’s the cost of MSAA?
Milestones (personal idea)
• FXAA (Fast Approximate AA) 快速近似抗锯齿:得到一副有锯齿的图,把边界换成无锯齿的
• TAA (Temporal AA) 时间抗锯齿:复用上一帧的像素的值,每帧采样的位置有变化
Super resolution / super sampling 超分辨率
• From low resolution to high resolution
• Essentially still “not enough samples” problem
• DLSS (Deep Learning Super Sampling)